JANESAWYERMAKES.COM
  • Home
  • Templates
  • Articles
  • Merch
  • Videos
  • About
  • Landing
  • Home
  • Templates
  • Articles
  • Merch
  • Videos
  • About
  • Landing
Search

How to Make a Polymer Clay Jack O'Lantern: 8 easy steps!

10/20/2023

0 Comments

 
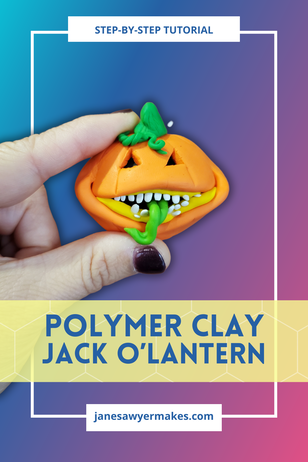
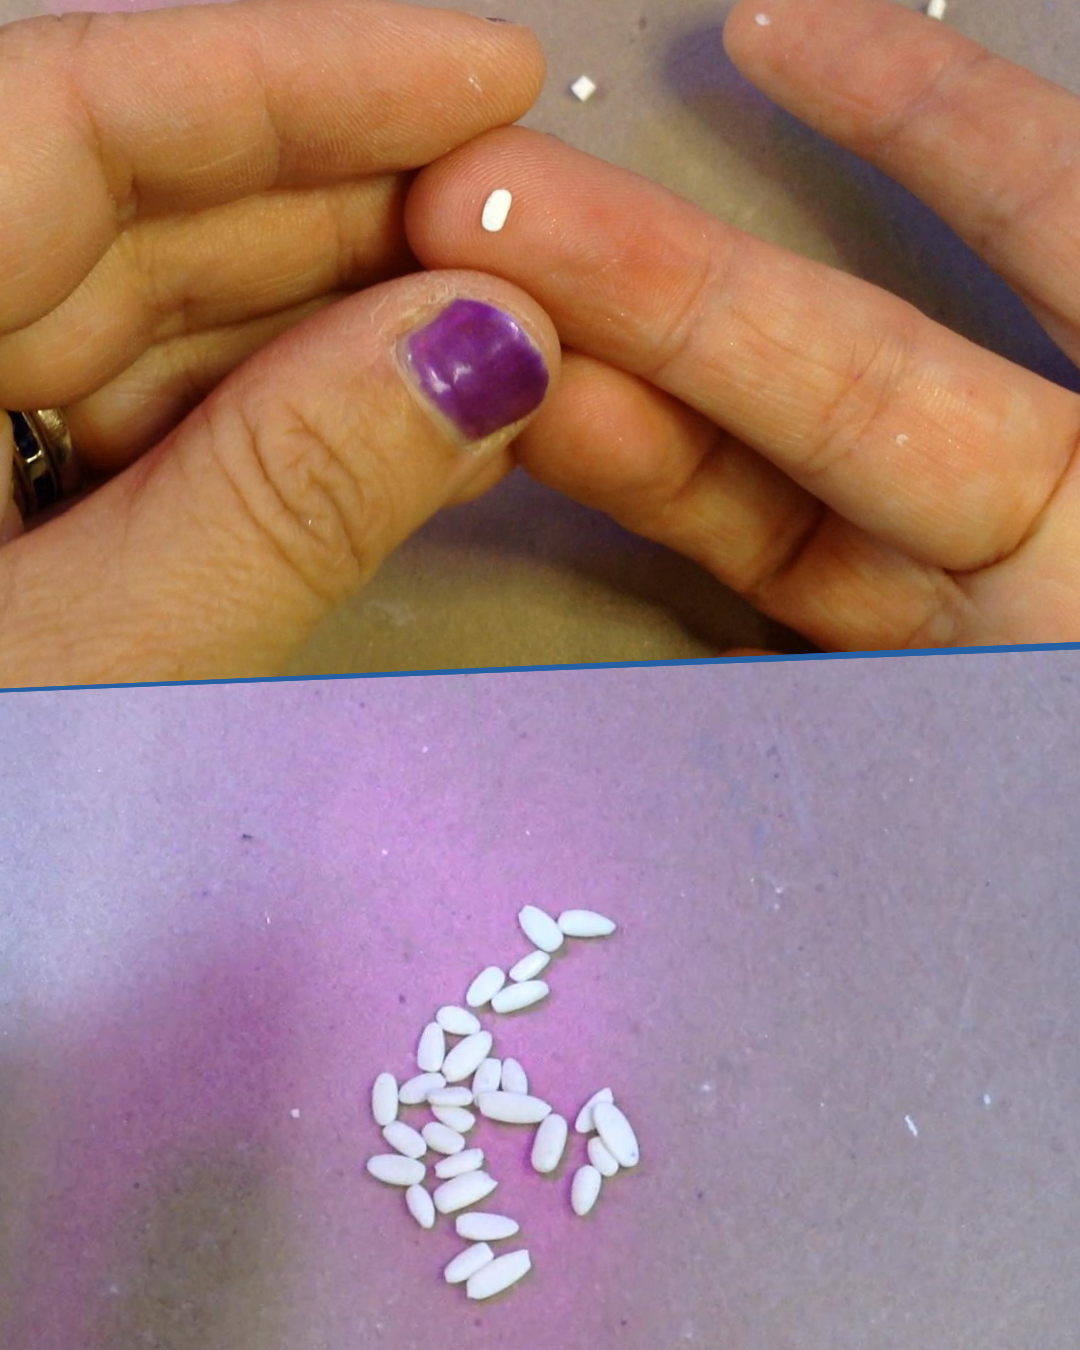
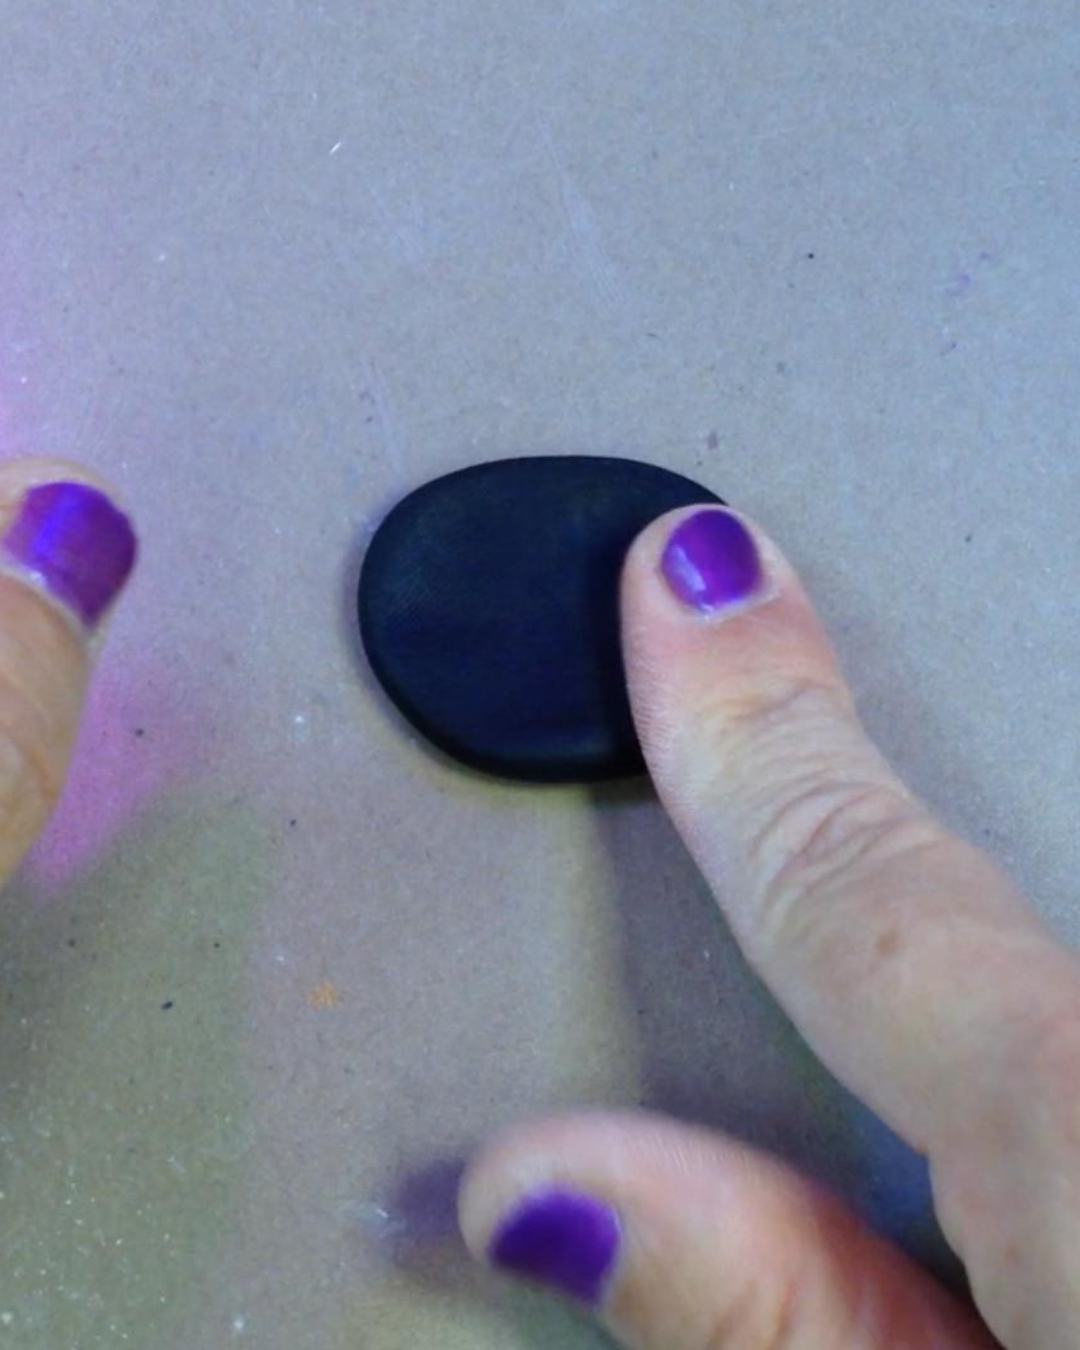
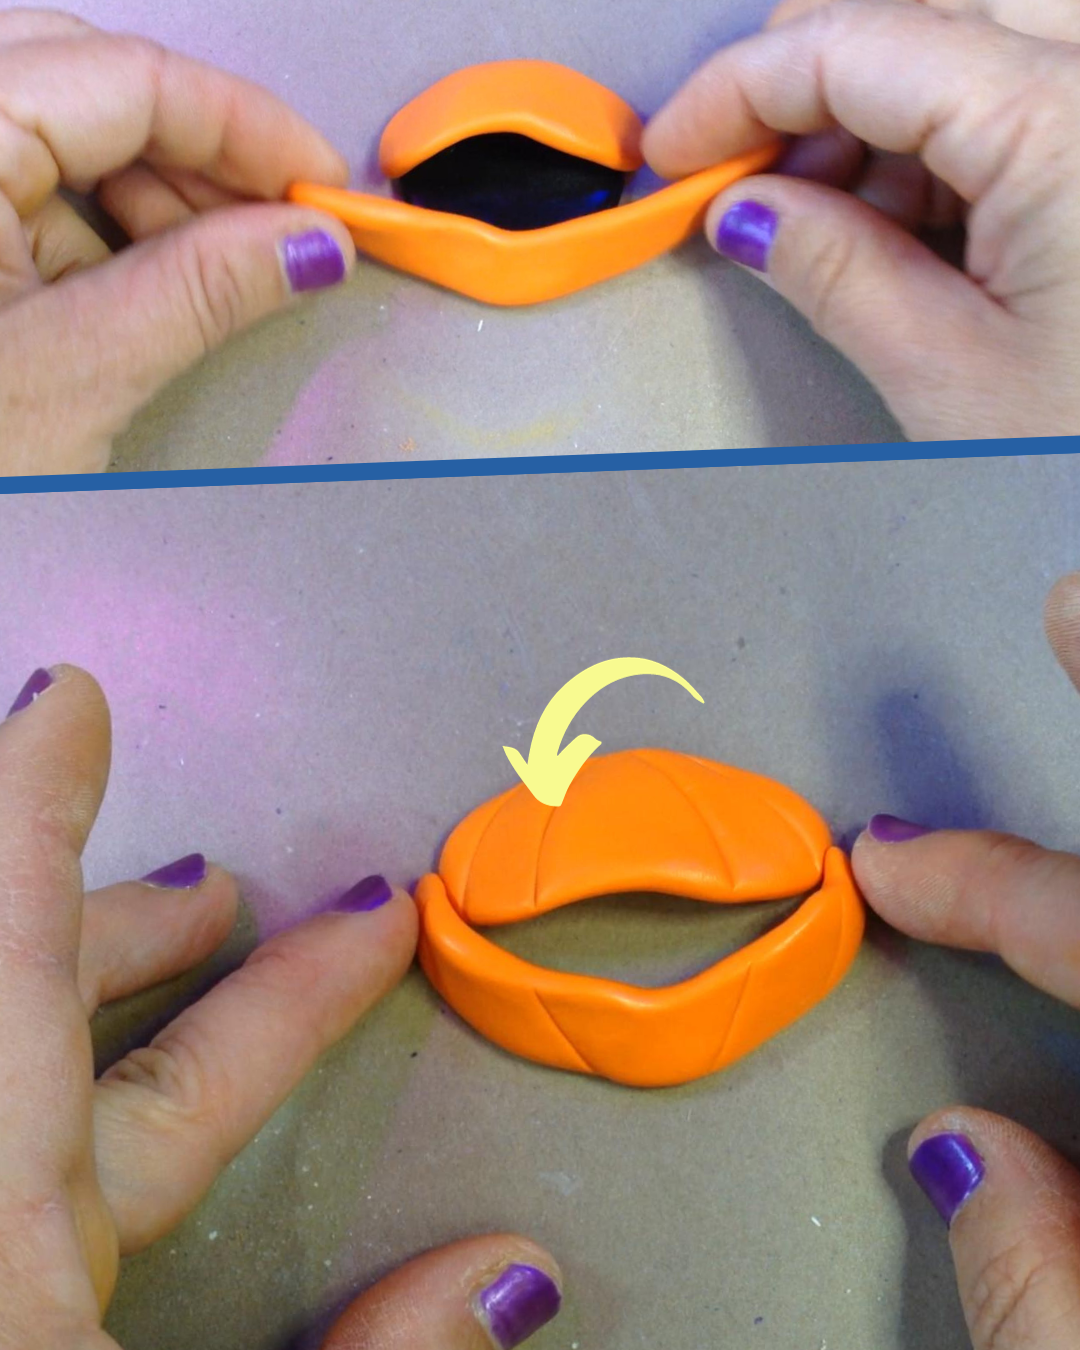
Watch the build video HERE!
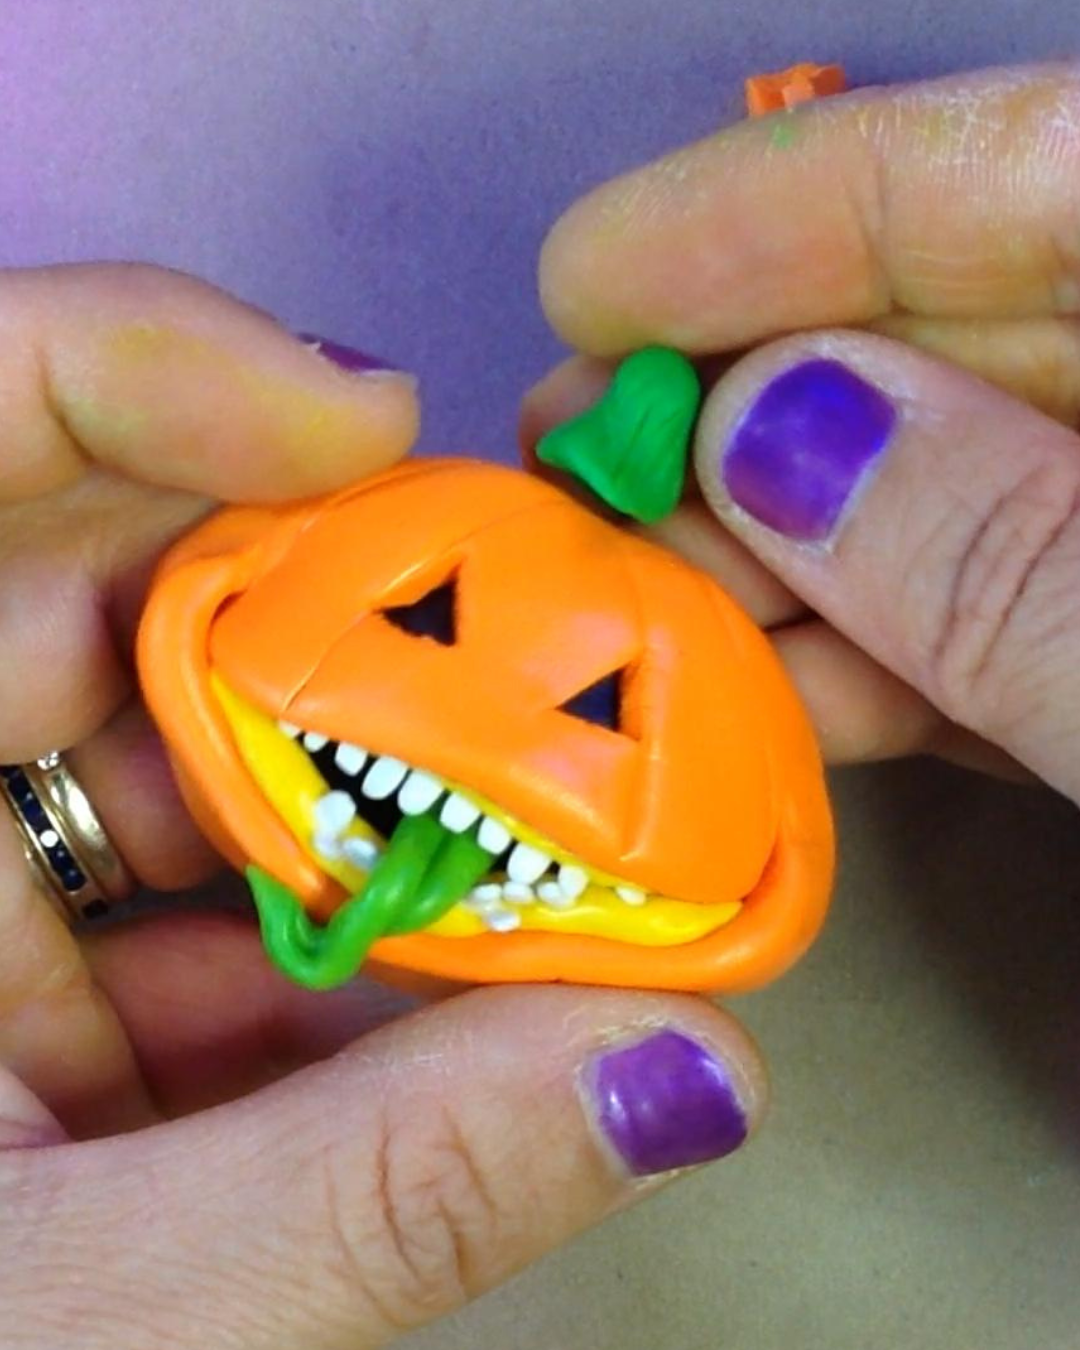
Picture
Let’s go step-by-step through a beginner-friendly Halloween polymer clay sculpting project: crafting your very own jack o'lantern.

I’ll summarize the 8 steps below, but you can also watch the tutorial in video format on my YouTube channel here. This project is fun for experienced sculptors, but I’ve used these techniques to make monsters with kids as young as 8!


This project uses a few different colours of oven-bake polymer clay, so it’s perfect for one of those affordable multi-colour starter-packs. I recommend Sculpey Premo for a good balance of workability and finished strength.

You could use air dry clay too.  Just make the teeth a few days ahead.  When the air-dry clay is really good and dry, you can add colour with acrylic paint.


All the following steps should be completed with warm, well-conditioned polymer clay.

Picture
Step 1: Preparing the Teeth

To kick things off, we'll create our pumpkin's impressive teeth. Pre-baking the teeth is the trick to making this project look more complicated than it actually is.

Roll small bits of white clay into tic-tac shapes and get them baking (according the the manufacturer's directions) while you move on to the next steps.

​Your clay's packaging should include appropriate baking instructions for whichever brand you're using (Fimo, Sculpey, Cernit, Pardo, etc.)

Picture
Step 2: Building the Foundational Blob
Step 2: Building the Foundation

The foundation of the pumpkin sculpture is a simple black blob.  Roll a ball of black clay that's about 2.5 cm (1-inch) across. Squish it into a pancake with your fingers or a clay roller. 

Easy, right?

​

Picture
Step 3: Constructing two face pieces. Note the pumpkin-texture lines.
Step 3: Constructing the Face

Using well-warmed orange clay, form two equal-sized balls.

Roll one into the shape of a cocktail weenie. and flatten 
to about .5cmm thick (¼-inch).

Make a longer hotdog shape with the second ball and curve it into a smile. Again, smush it to about .5cmm thick (¼-inch).

These will become the top and bottom parts of your pumpkin face. Add some lines with the back of a knife. 

​Now it's starting to look like a real pumpkin!


Picture
Step 4: Pushing the pre-baked teeth into the gums
Step 4: Crafting Teeth and Gums

Roll out a snake of yellow clay for each of the top and bottom gums.

Press the pre-baked teeth into the gums. Get creative with ghoulish teeth. If you have oven-bake clay adhesive, you can use a bit on the base of each tooth, but it's not necessary. Plus, if a pumpkin tooth falls out later, it will just make your jack o' lantern look even spookier!

Gently place the gums behind the top and bottom gums so they peek out a bit. Press the orange and yellow clay together gently, but firmly.

​

Picture
Step 5: Cutting the eyes. You could also just slap on a small triangle of black clay here.
Step 5: Carving the Eyes

I carved two triangles for eyes, but this was a bit fiddly. To make it simpler you could make make some black triangles and stick them on the face.

Either technique will look great, so choose whichever option works best for you!

Picture
Step 6: The tongue is a long snake that is tapered at both ends and folded in half.
Step 6: Adding a Tongue

Craft a green tongue by rolling out a snake of clay, tapering the ends and folding in half. If you need to, you can trim some length off of the chubby end.

Give the tongue a bend or twist to give it some character. Easiest creature tongue ever! 

Picture
Step 7: Assembling the face
Step 7: Assembly

Bring all the elements together—black blob, face parts, and tongue.

Press the top of the face onto the top of the blob.

Slide the tongue under the top of the face and use a tool to press the base of it into the blob.

While arranging the tongue over the lower teeth,  place the lower half of the face onto the lower portion of the blob.

Gently press to secure the pieces together or use oven-bake clay adhesive.  A tool can be used to really join the clay together.


​

Picture
Step 8: Add a stem and bake
Step 8: Creating the Stem and Finishing Touches

To make a stem, form a jelly bean shape from green clay. Press the clay against the table to flare the base, and add ridges for texture.

Secure the stem to your pumpkin. Add some curly vines for detail, if you'd like.

Cure the clay by following the manufacturer's baking instructions.
Displaying  Your Project
​Once your jack o'lantern has cooled, you can attach a pin back to make a brooch. If brooches aren’t your thing, turn your jack o’lantern into a fridge magnet, wall art, or anything else you can imagine!

If you want to watch each step of this project in detail, please check out the build video on my YouTube channel below. If you give this project a try, it would make my day if you’d share it with me. I’m @JaneSawyerMakes on TikTok, Instagram, Pinterest, Reddit, Threads,  and Twitter (X). Please share and pin this article!

0 Comments


Leave a Reply.

    More Articles

    Earth Dragon Egg
    ​Water Dragon Egg
    Fire Dragon Egg
    Large Paper Mache Snake
    Paper Mache Jackalope
    Paper Mache Blob
    Polymer Clay Toad
    Pumpkin Cottage
    ​Pumpkin Basket
    Cardboard Jack o' Lantern
    Paper Mache Pumpkin
    Splatter & Bloom Review
    Pringles Can Bird Automata
    Pringles Can Spooky Tree
    Pringles Can Fake Cake

    Pool Noodle Tentacle
    DIY Tree Bark
    Walking Bigfoot Papercraft
    Log Bookends
    Polymer Clay Mushrooms
    Dry Brush Painting
    ​Less Mess Paper Mache
    Sock Abominable
    Elf in e.l.f
    Soapstone Fox​
    Realistic Leaf Hack

    ​Audrey II Plant
    String of Hearts
    Foam Roller Plant
    Age a Terracotta Pot
    Polymer Clay Pumpkin
    Crystal Ball​
    Air-Dry Clay Bat
    5-Step Mushroom Jar
    3 Reasons to do Game of Shrooms
    5 Reasons You're a Fake Artist
    Alice in WALNUTland
    Walnut Shell Ring Box
    Apothecary Walnut
    Bigfoot Forest Walnut
    Baby Dragon in Walnut
    Tiny Hinge DIY
    How to Split a Walnut
    DIY Crystal Geode
    Propagation Station 
    Tiny, Tiny Chairs
    Abominable Snowman
    Krampus
    ​Sock Mothman
    ​Mini Top Hat
    Baba Yaga's Hut
    Less Mess Paper Maché
    Head Mount Dragon
    Building Moonwatcher
    Testing 5 Fill Media
    Thumbs-Up Machine
Powered by Create your own unique website with customizable templates.
  • Home
  • Templates
  • Articles
  • Merch
  • Videos
  • About
  • Landing