Baba Yaga's Hut
- Jane Sawyer Makes
- Oct 21, 2022
- 3 min read

Watch the BUILD VIDEO HERE!
You may not be familiar with the folklore behind this chicken-footed hut, but I'm sure you've seen this image before. It creeps up in pop-culture occasionally and has been featured in Warhammer and Dungeons & Dragons modules, comic books, films, and even on beer cans.
The cottage on chicken legs has its origins in Slavic folklore and belongs to the complex witchy character, Baba Yaga. In folklore, Baba Yaga is sometimes benevolent, sometimes cruel. She cruises through the forest on a mortar using a pestle to steer, dolling out both reward and punishment. She makes her home deep in the woods, inside her house supported on chicken legs.
Here's how you can build a mini Baba Yaga's hut. It's a fairly quick project (compared to some of my builds!) and the chicken legs are compelling and impressive but deceptively easy! Check out the build video here!
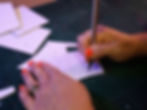
I used some scrap cardboard to workout a template for a whimsical cardboard house. I cleaned it up and it's available as a PDF above, if you'd like to use it. I used a craft knife to cut out the pieces and assembled it with hot glue.

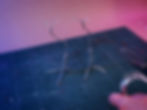
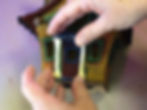
I really wanted the chicken legs to be free-standing because I thought a base would detract from the finished look. I used an internal tripod made from sturdy wire from the fencing section of my local hardware store. I was worried about the finished model being tippy if it was top-heavy, so I added some wight to the bottom my threading a half-dozen nuts onto the armature. I used a combination of aluminium foil and masking tape to flesh out and smooth the legs. The claws were made with polymer clay.

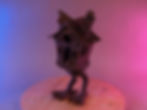
On top of the structural stuff, I added some texture. The bumpy texture on the feet was achieved by soaking some t-shirt yarn in watered-down glue. I added some scruffy feathers cut out of cereal box cardboard. You can see some button magnets in the MDF platform. The house will magnetize to the base later so that I can take it on and off to service an internal light pack.

At this point I revisited the house structure to add shingles, logs, and window frames. I bent each shingle upward to give that old and weathered look. The logs were cut out of a scrap of insulation foam, sanded round, and impressed with wood texture. All the window frames are made form dollar store foam board that I peeled the paper backing off of. If you can find foam board glue, it works really well here!


I primed the entire model with 2-3 thick coats of my secret model priming sauce. This seals everything, fills in any little cracks and gaps, and unifies the textures of all the different materials used so that everything takes the final paint in the same way. It also gives everything the base colour I want, because used a dry-brushing technique to paint the model.
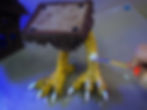
As a final touch I added a little awning over the front door, some preserved mosses, and a few little skulls and bones. I also filled in the empty windows and put the light pack inside the house. The full build video gives lots of great tips for building your own model and includes a more detailed break-down of each step! Check it out on my YouTube channel!
Below is a 15 second look at the finished sculpture. The full build video is about 17 minutes long, closed captioned, and is available here.
